A lot of electronics store owners focus heavily on sourcing good products, yet overlook in‑store layout and merchandising. Even with the exact same stock — headphones, chargers, laptop demo units — your display setup, lighting and customer flow can make a massive difference in shopper experience and final sales numbers. Today we’re walking through the complete BGR Solution retail build. We’ll cover the entrance reception spot, accessory sales area, hands‑on demo zone and back‑of‑house workspace, sharing real‑world design takeaways for overseas shop owners and trade buyers who are opening a new location or renovating an existing store.
Entrance Area: Brand Presence & Check‑in Counter
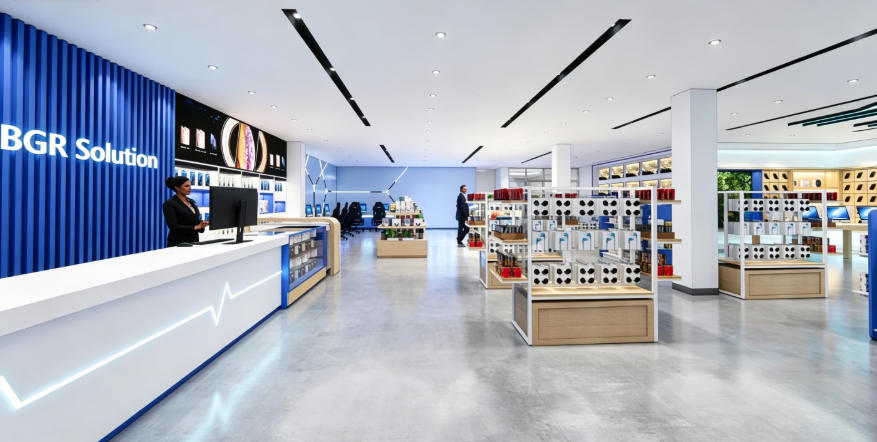
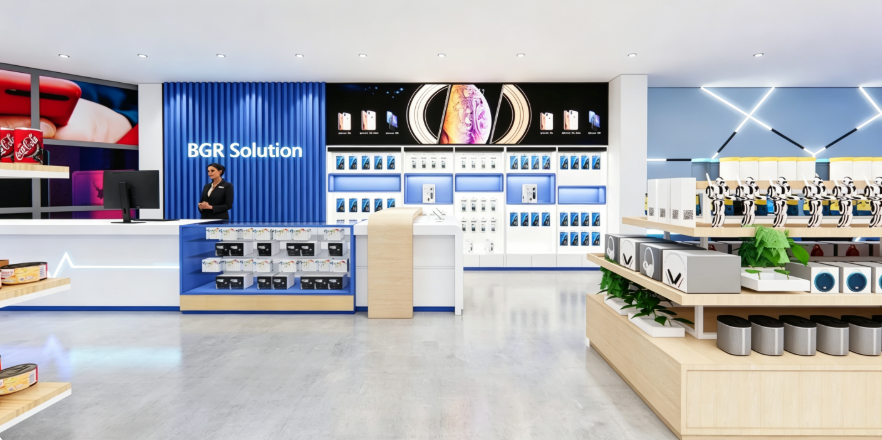
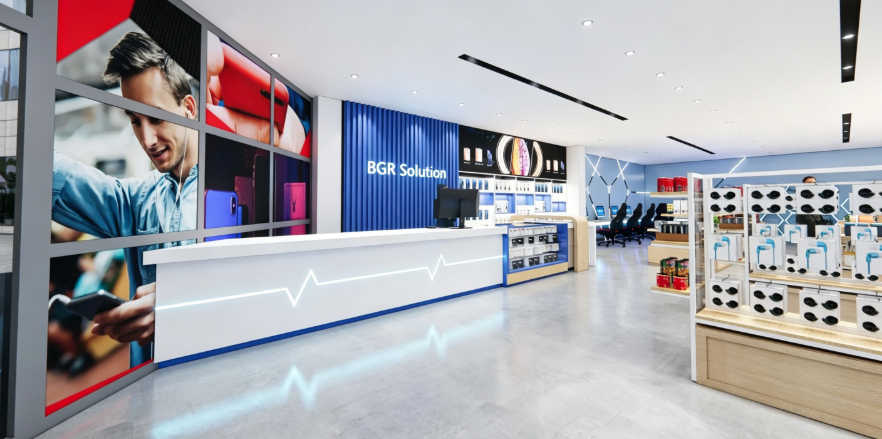
The main feature wall uses vertical blue fluted panels, paired with raised illuminated lettering showing the BGR Solution brand as the main focal point. On the left, a large multi‑screen video wall loops product promos for phones and electronics, grabbing attention from people walking past the storefront.
The checkout counter comes in white and blue. It has built‑in space for POS equipment, perfect for handling customer questions and completing transactions. A subtle angled LED strip runs along the counter front, adding that understated tech‑retail vibe. The whole floor is finished with light‑grey commercial flooring. It holds up really well against heavy foot traffic, easy to wipe down when dirty and keeps ongoing maintenance costs low.
Accessory Section: Practical Display for Large SKU Counts
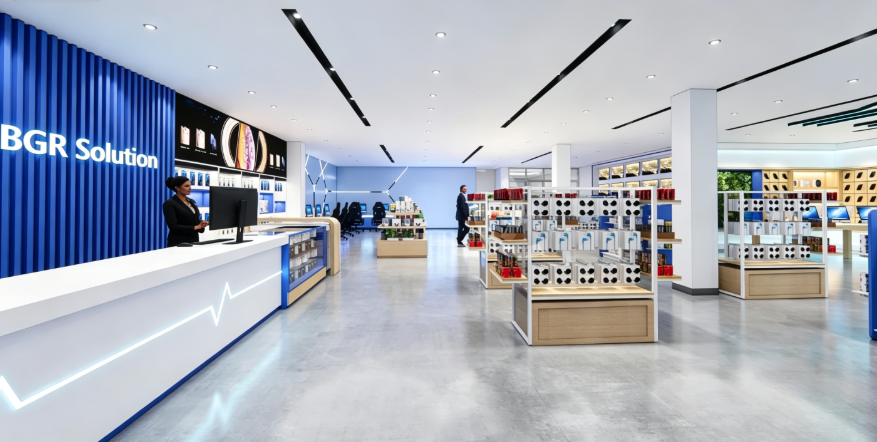
Electronics shops commonly struggle with huge accessory inventories: chargers, earphones, data cables, phone cases, Bluetooth speakers and many more. You want everything to look neat, let staff grab items quickly, and still have enough room to store extra stock.Wall‑backed display cabinets feature open cubbies with built‑in backlighting. Boxed accessories sit neatly in separate slots. The backlight makes product packaging stand out, so shoppers can browse freely without needing constant help from team members.
Multiple island display fixtures sit across the sales floor, finished with wood grain, white and brand‑matching blue. Varied‑height shelves hold fast‑moving items like headphones and speakers. Every island unit has closed storage at the bottom. You can tuck surplus inventory right underneath, so you don’t need a separate stock room and make the most out of your floor space. Merchandising follows natural customer shopping habits. Popular small‑sized accessories go at eye‑level for easy access, while bulkier speakers sit on lower shelves, making the whole shopping flow feel smooth.
Store Central Zone: Tall Cabinets to Divide Space & Keep Clear Walkways
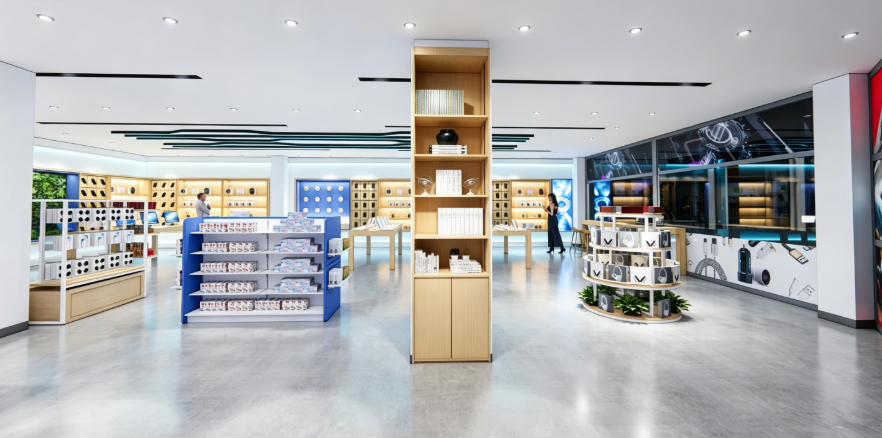
Instead of solid partition walls, we use tall floor‑standing cabinets to split up different functional zones. They create clear area boundaries without blocking sightlines, so the store never feels cramped or closed‑off. These central tall units have open upper shelves for brochures and decor pieces to spruce up the look, while closed lower sections offer extra storage space. Nearby, round rotating island racks hold small‑format electronics, visible to shoppers coming from every direction.
Modular island stands with blue accents come with plenty of shelving levels, great for displaying large volumes of boxed high‑turnover goods. Aisles are kept wide enough so multiple customers can move around comfortably during busy hours and walk through the whole store without bottlenecks.
Product Demo Area: Where Store Conversions Really Happen
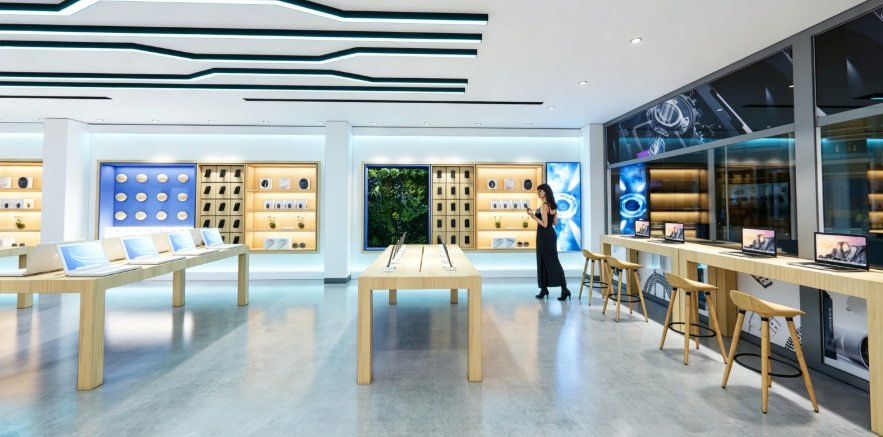
For 3C retail, being able to touch and test devices directly plays a big role in whether shoppers end up buying. Long natural‑wood demo tables hold laptop samples, matched with simple bar stools, giving visitors space to sit down and try out devices. Recessed lit wall niches showcase compact electronics. A few small plants soften the otherwise cold, tech‑heavy retail atmosphere. A full‑length demo counter runs alongside the street‑facing glass windows. Natural daylight highlights your products, and this window‑side display also catches eyes from passers‑by outside to draw new people into the shop.
Back‑of‑House Workspace: Combine Sales and After‑sales Service
Further toward the store rear, dedicated workstations are set aside for staff use. Sales happen out front, while the back section handles after‑sales support and internal office tasks, creating a unified sales‑and‑service setup. The same white‑blue‑wood‑tone colour palette runs through this area. Blue reinforces brand identity, and wood finishes tone down the sharp commercial feel. Ceiling lighting mixes downlights and long linear fixtures. Even, shadow‑free lighting across the whole shop helps show electronics in their best ligh.
3 Practical Tips for Electronics Store Operators From This Project
Plan zones following the natural customer journey. Start with brand reception and checkout, move to accessory browsing, then product demos and finish with back‑end service. Align your layout with how people naturally move through a store to guide them across your key selling spots.
Don’t only focus on how displays look — storage matters a great deal. Electronics accessories come in massive SKU volumes. If you only chase visual appeal with nowhere to store stock, piled‑up goods will quickly drag down your store’s overall look.
Lighting makes a real difference for electronics retail. Combine general overhead lighting with fixture‑integrated LED strips. Electronic products are quite sensitive to lighting conditions, and well‑thought‑out lighting noticeably improves how goods appear to shoppers.